| STREAM Online Help > Getting Started | <<Previous | Next>> |
This section describes how to launch the demo and gives a basic overview of the user interface.
The Web-based demo requires Java Web Start in order to run on the client machine. If you are using Java 1.4.1 or later, then Web Start is already installed on your machine, and you may skip this section. However, we recommend you to have JRE 5.0 to get the best running result.
If you have a pre 1.4.1 version of Java, you will have to download and install Java Web Start from Sun's web site. Java Web Start is part of J2SE 5.0 and is available here. From the many options listed here, the easiest and fastest one is to install the JRE 5.0.
For users of Netscape or Mozilla web browsers,
the Java Web Start executable might have to be manually registered as the
handler application for JNLP files.
Please set up the Java Web Start MIME
type JNLP in the Edit->Preferences->Navigator->
Helper Applications section. For example:
New Type... button and fill the fields:
File extension: jnlpMime type: application/x-java-jnlp-fileApplication to use: The javaws executable in your Java Web Start software directory must be specified here
Visit the demo web site at here. Follow the instructions to start up a server and launch a client. If Java Web Start does not launch after you click on the "Launch Server" button, please check that you installed Java Web Start and set up your browser correctly in the previous step.
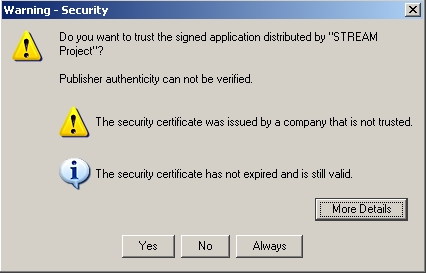
Note: Upon starting the demo for the first time you will receive the following security warning:
Select the "Yes" option to dismiss the message. The demo needs to access your local machine in order to save a few files into your home directory. All files used by the client will be stored in the .stream subdirectory in your home directory, which you can delete after you have finished using the demo.
When the client is started the main display window (described later) appears along with the following dialog:
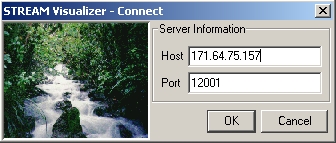
The demo should already be configured to connect to the server, so all you need to do is click the "OK" button.
When the client connects, the following screen will be displayed (but with empty panes when you start with no queries registered):
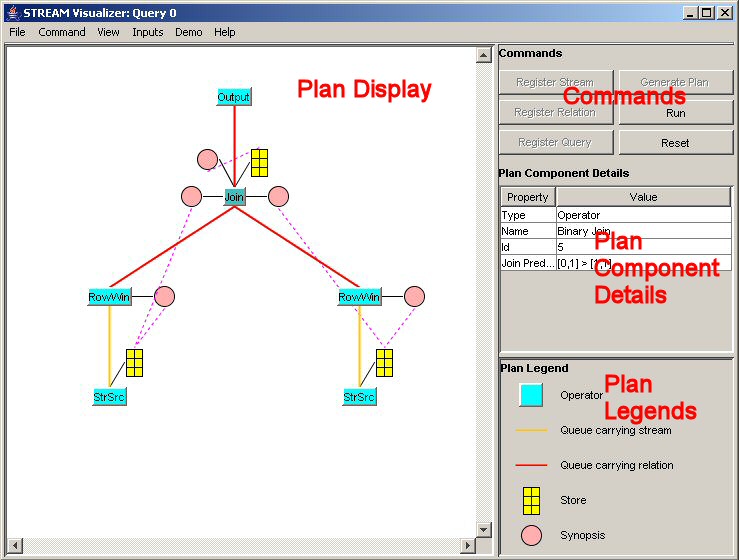
It is divided into 4 panes:
The Plan Display/Main Display pane is mainly used to view query execution plans as shown in the figure above. It can also be used to view the list of registered streams and relations and the list of registered queries. The user can switch from one view to another by using the View menu.
The Commands pane contains several command buttons, each of them corresponds to a specific command that the user can issue to the server. Please see Commands below for more details about commands.
When the user is viewing a plan, she can select individual components of the plan using a mouse click, and the Plan Component Details pane shows properties of the selected component.
The Plan Legend identifies the icons that are used within query plans.
There are six commands that you can issue to the server:
Notice that in a certain stage of the application, only commands that are appropriate for this stage are available for you to issue. For example, after generating plan, you can not make changes to registries until reset.
Menu options will be explained in greater detail later. Here is a brief overview.
The File menu contains commands to save registries (including streams, relations, queries and views) into a user specified file, to load registries from file, and to exit from application.
The Command menu contains the above mentioned six commands: register stream, register relation, register query, generate plan, run and reset. It also provides a "complete reset" option, which stops all running queries and drops all registered streams, relations and queries. Basically, the user can start from fresh again.
The View menu can be used to switch the display in the "Plan Display" pane. You can let it show all registered streams and relations, all registered queries, or the execution plan for each query (if the plan has been generated).
The Inputs menu provides a way to send tuples of a stream source into the STREAM system. For each registered stream/relation, there will be an entry for it. Selecting an entry from this menu will bring up a control that allows you to bind a data file to a stream source, to start and pause sending tuples, and to adjust the tuple sending rate.
The Demo menu provides some predefined demos for you to give the STREAM system a quick try. You can execute one of the demos by a simple click.
Some plan components in the "Plan Display" pane has their own Context menus. You can access the context menu by right clicking on the plan component. Most of them are related to monitors, through which you can track system performance while the query is executing.
A more detailed explanation of all the menu items is available in the Menu Reference section.
| STREAM Online Help > Getting Started | <<Previous | Next>> |
Last modified: Thu Jan 27 2005